Cities at War Controls and UI Guide
Learn the placement and management flow used in gameplay coverage, then verify every bind in your own Roblox settings.
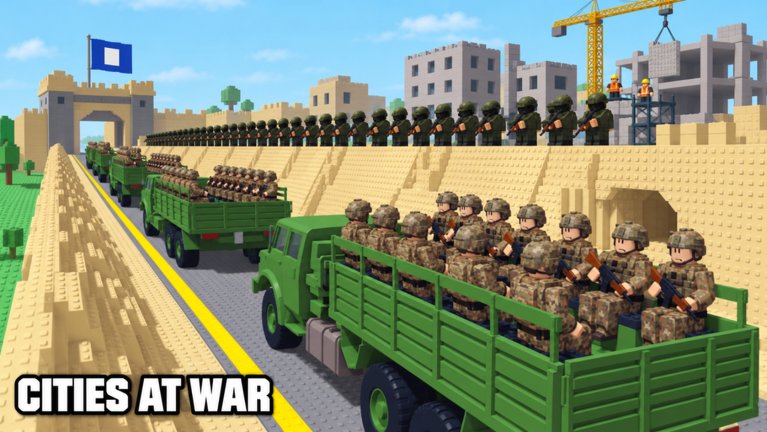
Cities at War plays like a building and army management sim inside Roblox. Winning sessions depend as much on clean UI habits—placing, rotating, selling, queuing research, and moving the camera—as on knowing which unit is strong. This page summarizes control and interface patterns verified from public gameplay coverage. Because Roblox experiences can remap inputs, treat every key mention as a starting hint and confirm the live binds in your in-game settings before you rely on muscle memory.
After you are comfortable with the tools, return to Getting Started and run the first-session checklist without fighting the UI.
Camera and map awareness
Spend the first minute learning how to pan, rotate, and zoom the camera across your plot and the wider map. You need to see docks, neighbors, and the Capital direction without losing track of unfinished buildings. Good camera hygiene prevents the classic mistake of expanding blindly while an outpost fight or rival raid happens just off-screen.
When you leave for a capture, glance home often. Small six-player servers punish tunnel vision. A quick camera sweep over production and tower lines is part of army micro, not optional sightseeing.
Building placement flow
Construction usually follows a select-building → preview ghost → place confirmation pattern. Open the build menu, choose farms, homes, mills, mines, barracks, or towers, then move the preview until it sits on valid ground. Watch for red or blocked previews that mean the tile is invalid, obstructed, or outside your buildable area.
Placement tips from successful openers:
- Place economy buildings in clusters you can staff and defend.
- Leave corridors before the plot fills; deleting later costs time and money.
- Put barracks where the exit path is obvious before you confirm the place.
- Do not spam previews you cannot afford—clarify cash first via docks sales.
If a building refuses to sit where you want, zoom in and check overlaps with paths, other structures, or terrain edges. Forcing bad fits creates the pathing problems described in Base Layout.
Rotate, adjust, and correct mistakes
Most building UIs offer a rotate control while the preview is active. Rotate footprints so doors, exits, or long edges align with your planned corridors. Straightening a barracks now is cheaper than selling it later because units path poorly.
When you misplace something early, decide quickly: live with a minor imperfection, or sell and replace before the surrounding grid hardens. Early corrections are part of learning the toolset. Mid-game panic rebuilds are what empty war chests.
Sell and manage existing structures
The sell or remove tool lets you reclaim space and some value from obsolete buildings. Use it for deliberate redesigns, not tilt deletions after a lost fight. Before selling production, check whether offline income and dock stockpiles will suffer. Before selling defenses, confirm you are not opening a lane right as a neighbor marches.
A clean management habit is to sell in pairs with a replacement plan already selected in the build menu. Empty holes help no one if builders are busy elsewhere.
Training, selecting, and moving armies
Military UI centers on barracks training queues and unit selection on the map. Train soldiers and higher tiers as unlocked, then select groups and issue move or attack orders toward outposts and other objectives. Keep a subset ungrouped as home guard so one select-all mistake does not empty the city.
Practice selecting only what you intend to send. Accidental all-in marches are a controls problem as much as a strategy problem. Staging near your outward corridor—see the army and layout guides—makes group orders cleaner.
Research and menus navigation
Open the research or skill interface from the main HUD when you are ready to spend points. Browse economy, build speed, and army branches, read what each node changes, and confirm purchases deliberately. It is easy to click the wrong branch when a fight is ongoing; if needed, pause aggressive moves until the research spend is done.
Other menus you will visit often include docks or trade panels for price checks, housing and worker overviews, and any settings screen that lists keybinds. Make the settings visit early so rotate, camera, and hotbar habits match your device.
Device notes and settings confirmation
Play on the device you actually use for long sessions. Mouse and keyboard players usually place and rotate faster; touch players should slow down on preview confirmation to avoid mis-taps. Controllers, if supported in your session, need extra attention to UI focus.
Because binds can differ by platform and patch, open settings and verify:
- Camera pan, rotate, and zoom.
- Building rotate while placing.
- Sell or demolish command.
- Unit select and command inputs.
- Menu hotkeys for build, research, and trade if present.
Do not memorize a wiki table over the settings screen in your live client. Coverage videos show common flows; your client is authoritative.
Controls mistakes that cost games
- Placing barracks without rotating toward an exit.
- Selling production mid-dip instead of waiting a dock tick.
- Select-all attacking the Capital with no home guard.
- Ignoring research menus until rivals are already stronger.
- Never checking settings after a Roblox or game update remaps keys.
Fixing these is free skill. They often matter more than a single unit unlock.
Practice routine
- Join a low-pressure server and open settings to confirm binds.
- Place a small farm and housing cluster using rotate intentionally.
- Sell one misaligned building and replace it cleanly.
- Open docks, note prices, sell a small stack.
- Open research and buy one bottleneck upgrade.
- Train a tiny squad and move it to a nearby marker without emptying home.
When that routine feels automatic, you are ready for the full opener in Getting Started and the deeper systems guides linked from the Guides Hub.
Controls mastery will not capture the Capital alone—but poor controls will lose the Capital you were otherwise ready to take.
Frequently Asked Questions
Quick answers for Cities at War on Roblox.
Are Cities at War keybinds the same on every device?
Not reliably. Roblox platform and game updates can change inputs. Always confirm camera, rotate, sell, and unit commands in your in-game settings.
How do I rotate buildings while placing?
Select a building to show the placement preview, then use the rotate control shown in your client or settings. Align exits and long edges before you confirm.
When should I sell a building?
When you have a replacement plan that improves pathing, defense, or production. Avoid tilt-selling income buildings during a temporary dock price dip.
How do I keep from sending my whole army by accident?
Practice partial selection and keep a dedicated home-guard group. Staging units in an outward corridor makes controlled marches easier.
Where do I open research?
From the main HUD research or skill button. Spend deliberately on income, build speed, or army strength, then return to the map.
What should I practice before my first real capture?
Placement with rotation, a clean sell-and-replace, a docks sale, one research click, and a small squad move that leaves defenders at home.